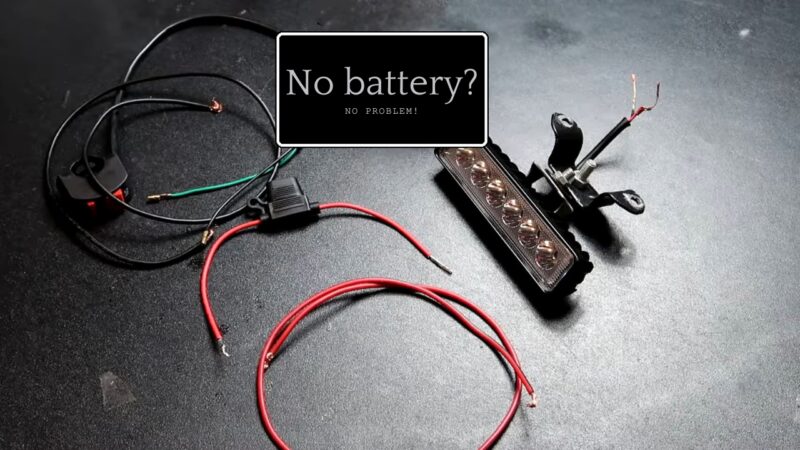
Setting up lighting on your dirt bike without relying on a battery is something I’ve found to be really practical, especially for folks like me who ride in rugged terrain or remote areas where having your battery die can be a big problem. This approach means your lights will stay on as long as the engine is running, which is super handy.
It also cuts down on maintenance and potential failure points compared to a battery-powered system. We will explain how to connect wire dirt bike lights and easily fix the light on your bike.
First, you need to understand the components of the bike. Let’s go step by step.
Yes, It Is Possible
It is possible to wire lights on your dirt bike without a battery. You will need to find the stator’s hot lead, which typically has accessory power. Connect this directly to the lights, and ground to the frame, not the handlebars.
You’ll also need a stator with a lighting coil for this to work. However, while it’s tempting to add lights to your dirt bike for night rides, wiring lights without a battery is not recommended for several reasons, which we will explore further.
Components
You’ll need a lighting coil or stator, a voltage regulator, and lights compatible with your dirt bike’s system. The lighting coil generates the electricity, and the voltage regulator ensures a consistent voltage is delivered to the lights. Choosing LED lights is recommended as they require less power and are more efficient. You can purchase these parts from local bike shops or online stores.
Ensure they are compatible with your bike’s make and model to avoid any issues during installation. You can run lights on your dirt bike without a battery by using a small AC regulator grounded to the frame. Halogen bulbs will work on AC or DC.
Yet, LEDs will work better with DC. Ensuring compatibility of these components with your bike is crucial to avoid electrical failures and ensure reliable performance.
Wiring Diagram
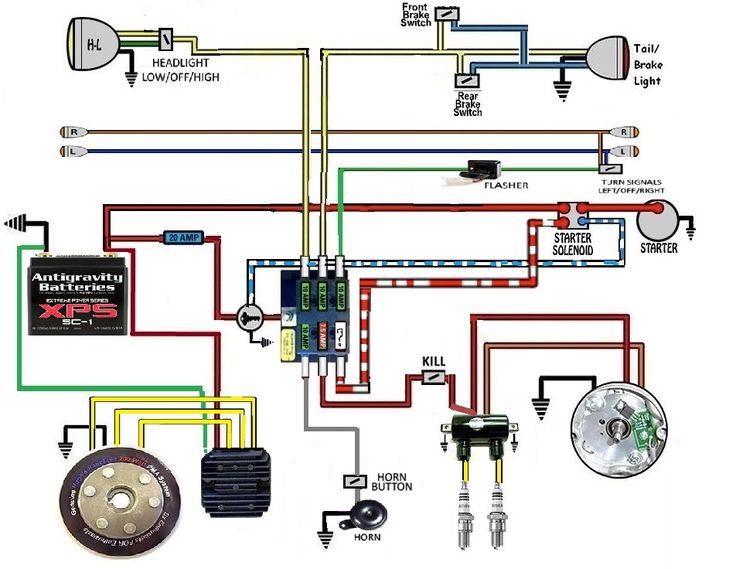
The key is to have everything clear in your head. To create a scheme of what is done first, what second, and what last. Every bike should have an explanation in the manual. If you don’t have a manual, look for a wiring diagram.
What is that?
Wiring diagram is a graphical illustration that depicts the electrical wiring of a motorcycle. It uses colored lines to represent the wires and symbols to represent the electrical components.
The left side of the diagram typically represents the headlight, while the right side represents the taillight. The purpose of a wiring diagram is to help you understand how the electrical system works. It can also help you troubleshoot electrical problems.
Lighting Coil
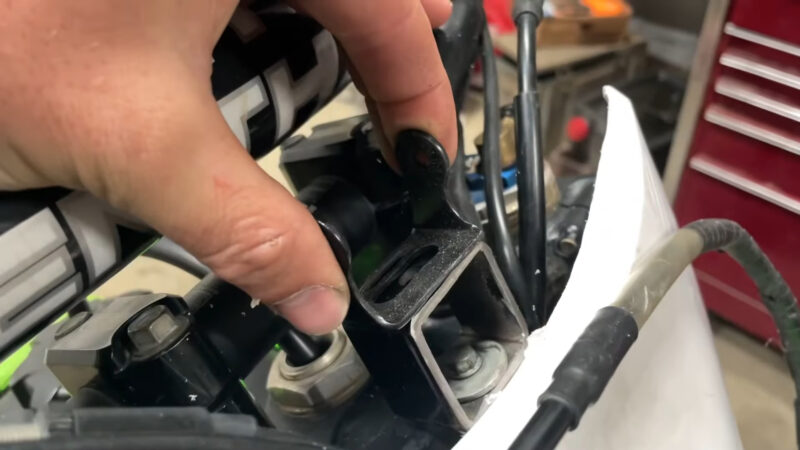
The lighting coil is a key component that generates the power for your lights. To install it, you first need to locate the stator, which is usually found behind the left side cover of your bike’s engine. Remove the cover and you’ll see the stator.
The lighting coil is installed onto the stator. Follow the specific instructions for your bike model to attach the coil. This step might require removing the stator and reassembling it with the lighting coil attached.
Make sure all connections are secure to avoid any power issues. The process requires some technical knowledge of electrical systems and careful handling to avoid damaging the components.
If not done correctly, the unreliable power supply can become a safety risk, compromising your headlight and nighttime visibility. While it’s tempting to add lights to your dirt bike for night rides, wiring lights without a battery is not recommended.
Here’s why:
- Unreliable Power: Dirt bikes use an alternator to generate electricity while running. This creates inconsistent power output, making lights flicker or dim at lower RPMs.
- Safety Risk: Unstable power can affect your headlight, compromising nighttime visibility.
- Technical Complexity: Adding lights requires a voltage regulator (rectifier) to convert AC from the alternator to DC for lights. This project requires knowledge of electrical systems and careful wiring to avoid damage.
Safer Alternatives:
- Replace Battery: If your battery is dead, consider replacing it for a complete electrical system.
- Headlamp with External Battery: Look for headlamps with built-in batteries or external battery packs designed for bikes.
- Daytime Riding: Limit your riding to daylight hours for optimal visibility and safety.
Connecting the Voltage Regulator
Once the lighting coil is installed, the next step is to connect the voltage regulator. The regulator ensures the power generated by the coil is at the correct voltage for your lights. Find a good spot on your bike’s frame to mount the regulator.
It’s often placed near the coil or under the seat. Connect the regulator to the lighting coil using the wires provided, following the wiring diagram.
Secure the connections are tight and secure, as loose connections can lead to malfunctioning lights. Adding a voltage regulator (rectifier) is crucial as it converts AC from the alternator to DC for the lights. Without this conversion, the lights may not work properly or could get damaged. This step requires precision and attention to detail to ensure a stable power supply for your lighting system.
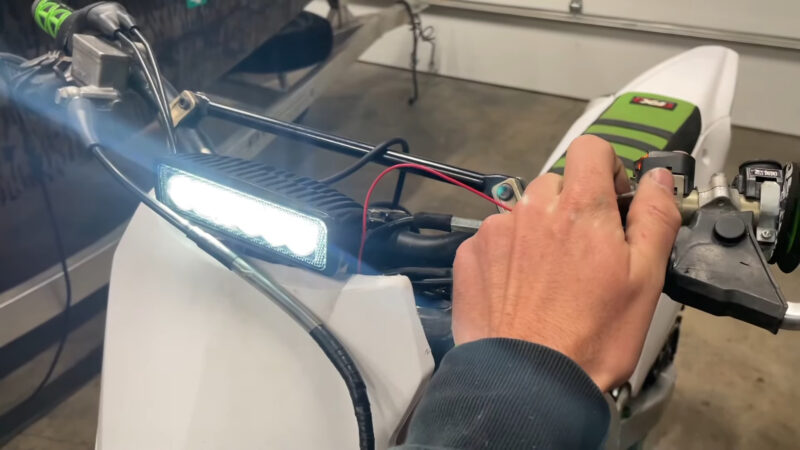
Wiring the Lights
With the lighting coil and voltage regulator in place, it’s time to wire the lights. Start by selecting the locations for your lights on the bike. Headlights are typically mounted on the front, while tail lights are placed at the rear. Run the wires from the lights to the voltage regulator and connect them according to the wiring diagram.
Make sure to use waterproof connectors and tape to protect the wires from moisture and dirt. This step requires patience, as you need to ensure all connections are correct and secure to avoid any electrical issues.
Connecting the lights directly to the stator’s hot lead is a straightforward method, but it requires careful grounding to the frame and not the handlebars. Proper grounding is essential to prevent electrical malfunctions and ensure the lights function correctly.
Testing and Troubleshooting
After wiring the lights, it’s crucial to test the system. Start your bike and check if the lights turn on. If they don’t, recheck all connections and make sure there are no loose wires or faulty components. Use a multimeter to check the voltage levels at various points in the system. This can help you identify any issues with the wiring or components.
If the lights still don’t work, consult your bike’s manual or seek help from a professional. Ensuring your lights work properly is essential for your safety and the functionality of your bike.
The process of adding lights without a battery is technically complex. If done incorrectly, it can lead to unreliable power and safety risks, such as unstable lighting that affects nighttime visibility. Always ensure all connections are secure and follow the wiring diagram meticulously.
Do you know how and how often you should grease your pedals? I’m here to show you, read more.
Maintaining Your Light System
- Headlight and Taillight: Choose compatible lights for your dirt bike.
- Regulator/Rectifier: Converts AC to DC and stabilizes voltage.
- Wiring Harness: Pre-made harness or wires and connectors.
- Switch: To control your lights.
- Multimeter: For checking voltage and continuity.
- Soldering Iron and Solder: For secure wire connections.
- Insulation Tape and Heat Shrink Tubing: To protect connections.
- Cable Ties: For organizing wires.
Step-by-Step Instructions
- Identify Power Source:
- Locate the stator or magneto, which generates power. This component usually produces AC power, which needs to be rectified to DC for lights.
- Install the Regulator/Rectifier:
- Connect the stator’s output to the regulator/rectifier. This device will convert AC to DC and regulate the voltage to a safe level for your lights.
- Route the Wiring:
- Use the wiring harness to connect the regulator/rectifier to the headlight and taillight.
- Ensure wires are routed neatly and secured with cable ties to prevent interference with moving parts.
- Connect the Headlight:
- Attach the headlight’s positive wire to the positive output from the regulator/rectifier.
- Connect the negative wire from the headlight to the frame or a suitable ground point.
- Connect the Taillight:
- Similar to the headlight, connect the taillight’s positive wire to the regulated positive output.
- Ground the taillight by connecting its negative wire to the frame or another grounding point.
- Install the Switch:
- Install a switch in an accessible location on the handlebars.
- Connect one terminal of the switch to the positive output from the regulator/rectifier.
- Connect the other terminal of the switch to the positive wires of the lights.
- Secure All Connections:
- Solder the wire connections for a reliable electrical connection.
- Cover the soldered joints with heat shrink tubing and use insulation tape for additional protection.
- Test the Setup:
- Use a multimeter to check the voltage at various points in the circuit to ensure the regulator/rectifier is working correctly.
- Start the bike and turn on the switch to test the lights. They should illuminate without any flickering or dimming.
- Final Checks:
- Ensure all wires are secure and not in contact with hot engine parts or moving components.
- Check the lights in both static and dynamic conditions to ensure they are functioning properly.
Conclusion
Wiring the lights on your bike without a battery is a useful task that improves both safety and aesthetics. With the right components and a clear understanding of your bike’s wiring, you can achieve a reliable lighting system at home. This project requires patience and attention to detail but is doable with basic tools and know-how.
However, while this method allows you to add lights without a battery, it’s not a recommended approach for everyone. The unreliability of the power supply and technical complexity present significant challenges.
Safer alternatives include replacing the battery or using headlights with external batteries. If you often drive at night, these alternatives provide more reliable and safer solutions.